

How To Half Cut Crease Makeup
How to Do a Half Cut Pucker in Only 7 Steps
November xvi, 2018
-

Facebook
-

Pinterest
-

Twitter
-

Copy
If you spend any fourth dimension on the 'gram, chances are you've drooled over a cut crease or two . It'southward an ultra-popular eyeshadow look that involves carving out the eye to create a divers pucker surrounded by diffused smoky shadow . A traditional cutting crease creates a clear line of demarcation between the lash line and crease, creating lots of lid space to testify off glitter or a neutral, concealer shade.
If mastering eyeshadow looks was a sport, we'd consider the cutting crease to be an olympic-level wait. Information technology requires an impressive amount of blending, an understanding of eyeshadow placement, and the ability to carve out a crease using goose egg but a flat shading brush and concealer.
If y'all're newer to eyeshadow and still desire to give the look a try, we recommend the half cutting crease, where you only ascertain half of your crease and create a diffused, smoky look on the the other one-half of your eye. And because visuals are everything, nosotros've created the tutorial ahead to assistance you exercise just that.
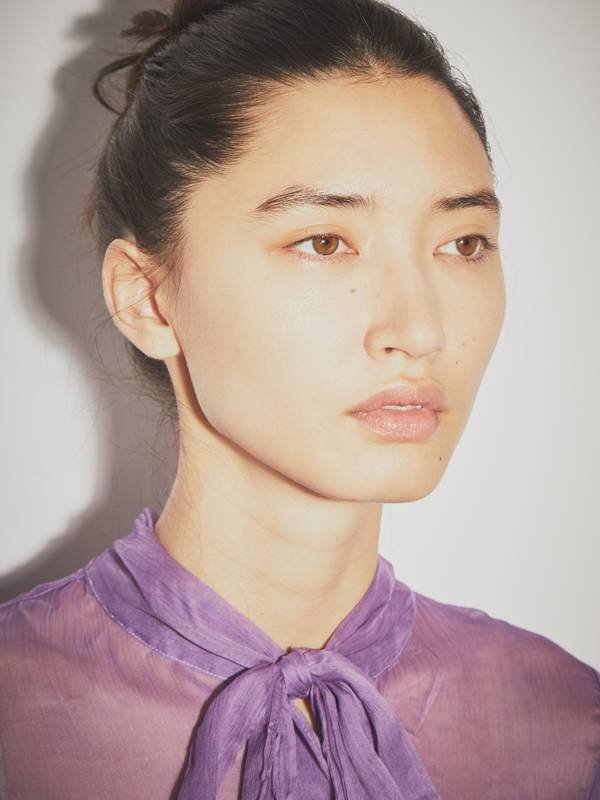
Stride 1: Prime the eye using a longwear, transfer-proof formula similar NYX Professional Makeup Proof IT Waterproof Eyeshadow Primer .
STEP two: Define the crease using a fluffy eyeshadow brush and a neutral shade that is 1 to two shades deeper than your skin tone. This will add dimension and definition without distracting from the overall expect.
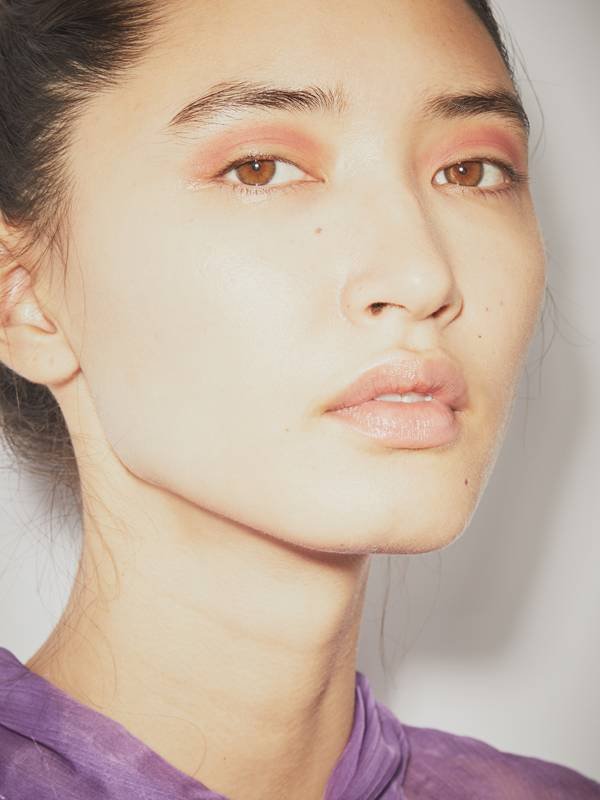
STEP 3: Further define the crease using a deeper eyeshadow shade. This should be concentrated in the outer corner of the eye and tin can be a neutral shade or a brighter, matte shade if yous're going for a more colorful look.
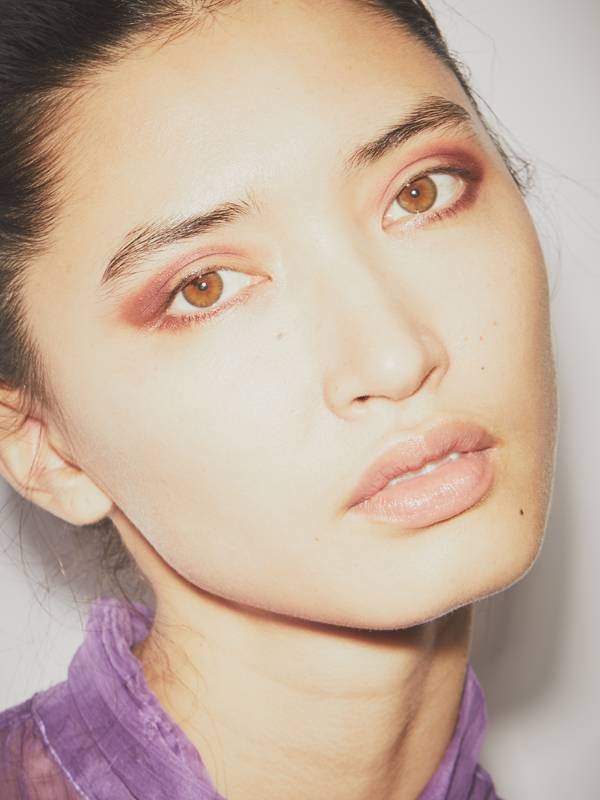
STEP 4: Outline half the crease using a concealer that won't budge like NYX Professional Makeup Concealer Jar and a flat shader brush. Bring the concealer to the center of the eye, and blend into the shadow without mixing them together.

STEP 5: Hither, you tin can either set the concealer with a neutral, matching shade or add a pop of color to accept the await to the adjacent level. The choice is yours.
Step 6: To tie the wait together, employ the shadow from the outer crease underneath the eye, and smoke it out.
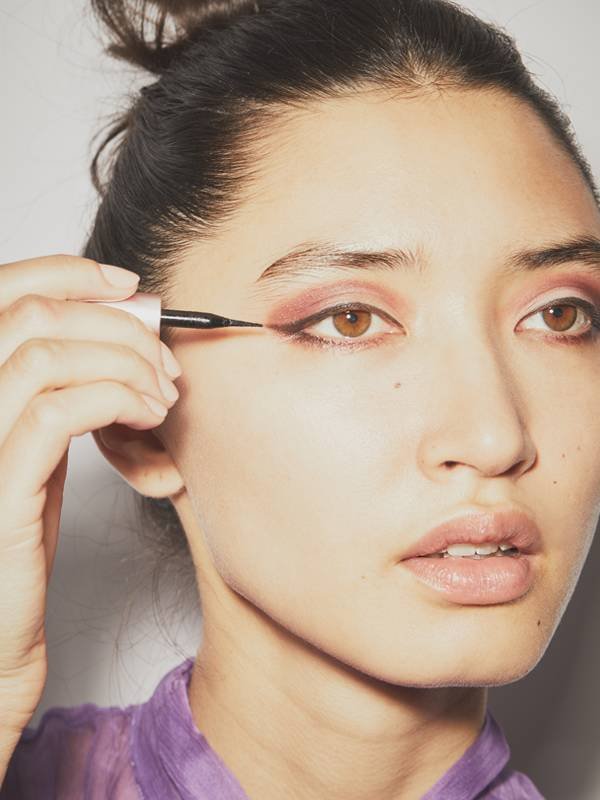
STEP 7: Use winged liner that compliments your center shape. We recommend an piece of cake-to-control liquid formula like Lancôme Artliner for a well-baked, ultra-defined moving picture.
Makeup: Justine Sweetman
Hair: Johnathan Rackleff
Read more than

How To Half Cut Crease Makeup,
Source: https://www.makeup.com/makeup-tutorials/eyes/half-cut-crease-eyeshadow
Posted by: feldmanjudianob.blogspot.com
0 Response to "How To Half Cut Crease Makeup"
Post a Comment